Thursday, March 31, 2011

Thrifty Thursday!

You all know how much I love a good deal. Well, I wanted to brag. Last week we went out on a date (dinner AND a movie) for under $20. I know.

THAT’S CRAZY TALK!!!

You are now all asking,
<How did you do it???>

And if you weren’t, you are now. <Hah, I’ve got ya now!>

Well, as much as we all hate SPAM emails and advertisements that come in the mail. I went ahead and signed up for almost every deal site I could find. (Yes, that’s a lot of emails that I just delete every day) These deal sites can either help you have a good time and still make budget, OR they can very easily cause you to bust your budget wide open. I suggest signing up with caution, purchasing after much careful consideration with your spouse, and making sure that you use it before it expires.

So, the story begins:
A couple of weeks ago, livingsocial.com had a deal for 2 fandango tickets for $9 (that’s less than the price of one ticket here in Seattle).
Now. you can see where this is going…

Did I mention that the movie we went to see started AT 7pm…. which is also Bitty Bear’s bedtime goes to sleep? So how did we get dinner out, (for less than $11) without going drive through? Ok, and this is where I become criminal. We snuck food into the theater. A whole pizza. In plastic ware. And napkins. And soda. and we cooked it ourselves (ok, you caught me, it was a frozen pizza, but it doesn’t have to be!). It would have been even better if I’d remembered paper plates.And we were early!! I still can’t believe we made it in time. This is the part that takes planning and makes the date more fun. And if you have older kids, you can make the pizza with them before the babysitter arrives so that you will have spent some quality time with your kids and your spouse before you go stare at a huge screen for 2 hours.
Smile

3 key components to this date that may or may not be reproducible: my Bitty Bear skipped her nap that afternoon and was PASSED OUT at 6:15 pm. We have awesome friends who will babysit for free. This is essential for the $20 date. Otherwise, you’ll shell our $20 alone for the babysitter!! And lastly, I have a big purse. Don’t try sneaking food into the theater if you have a small purse. That’s just awkward.

So there you go. A thrifty date that was lots of fun, thrilling (come one, you know that sneaking food into the theater is something that you loved doing in college but can’t bring yourself to do now that you have a full time job), and didn’t break the budget.

What have you done this week to keep it cheap?

Wednesday, March 30, 2011

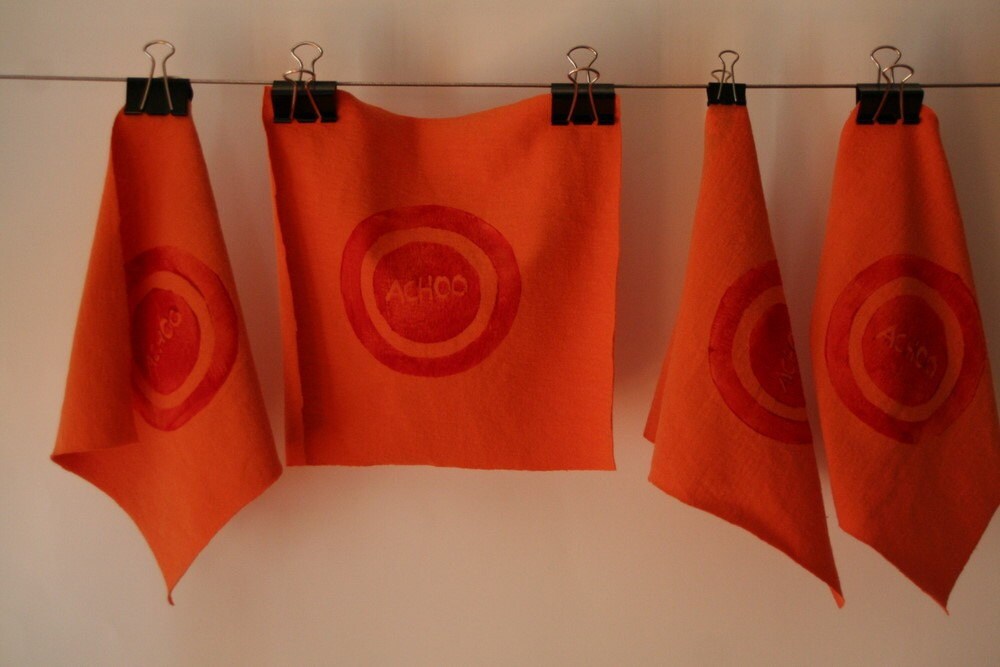
Achoo!!!

We've had a bad case of the sniffles this week that just don't want to quit! Since we've been out of commission and unable to be crafty ourselves, this week's craftiness is brought to you by my friend Bekah's  Etsy Shop. She's a genious when it comes to upcycling!
I think this is such a perfect (and fun!) way to teach your kids how to cover their mouths when they sneeze.

Tuesday, March 29, 2011

Meal of the Week 3: Salmon Steaks

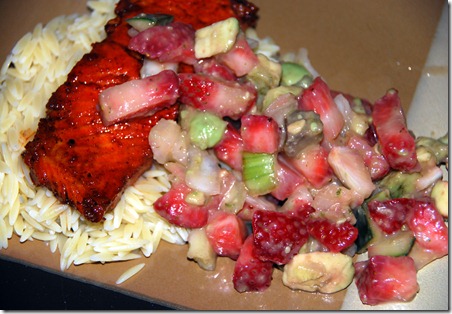
Strawberry Salsa and Salmon Steaks!
This week’s meal is brought to us by none other than the handy-dandy Better Homes and Gardens New Cook Book. Imagine that? The big old cook book that’s just been sitting collecting dust on your shelf while you scour the internet for another tasty recipe actually has some good eats in it!
For this recipe you will need:
2 Salmon steaks
2 avocados, pitted and peeled (about 1 cup)
2 C of strawberries (preferably overripe) chopped
1/2 C chopped seeded cucumber
2 T honey
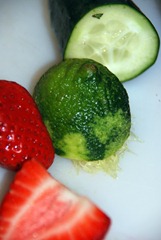
1 tsp finely shredded lime peel and
2 T juice of a lime
1 jalapeno pepper, seeded, finely chopped (be careful! they’re nasty in the eyes!)
1/4 tsp cracked black pepper
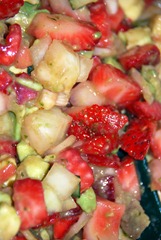
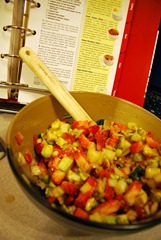
DSC_0051DSC_0053DSC_0038
Combine all the salsa ingredients. Make sure they’re chopped to your preference consistency. Chill in the fridge for up to 24 hrs.
For a plain salmon (and to experience the salsa most exquisitely) try this baking option:
On a large sheet of tinfoil, dress your salmon steaks (or in my case, fillets) with the salsa. Roll up the foil around the steak. and bake in the oven at 450 for about 20 minutes. Salmon doesn’t have to be cooked through, so use a meat thermometer to check for doneness. I like mine medium well.
DSC_0066For a more luxurious salmon (which is also a little less healthy) Try this pan frying option:
Mix 1/4 C honey, 1 T chili powder, 1 clove of pressed garlic, and 1 T olive oil in a small bowl.
DSC_0075
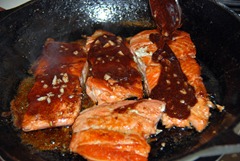
With the heat set to Med/High, pour a little olive oil in a skillet and place salmon steaks/fillets on the skillet skin side up. After about a minute, flip the fillets. Once they are almost cooked through, spoon the honey/chili powder mix over top of the fillets. Lower the heat to Low and continue spooning the mixture as it boils from the pan over the fillets as it becomes a glaze like syrup. Serve immediately.
DSC_0093
My Substitutions: First off, I’m just not ready to handle a fresh jalapeno. So instead we just put some Texas Pete’s in the salsa mix. For extra bulk and spice and because I felt like it, I added a small onion. After tasting the mix with the salmon, I’m actually going to recommend that you stick with the base recipe. the onion added too much bulk and the lack of jalapeno made the salsa a little too sweet. It was still good! … it just would have been better if I’d stuck to the recipe.
DSC_0055For chopping convenience I used my Vidalia chop wizard – I love it!! It makes chopping fast, clean, AND!!! it will measure the amount you have chopped for you!!! No more estimating!!

For sides try a nice fresh salad, a side of orzo with lemon juice, olive oil, sea salt and fresh cracked pepper, or some tortilla chips so you can finish off the rest of your salsa.
Next week we’ll try a butterscotch apple cake. Happy Eats!
And we're linking up to these fabulous parties!

Wednesday, March 23, 2011

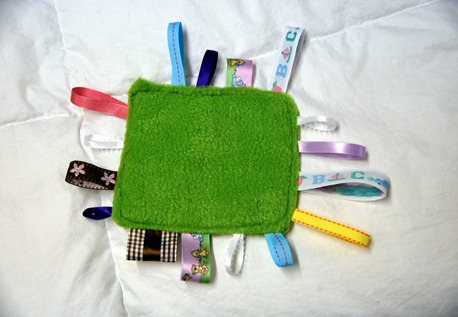
A Tag-rific Tutorial

You know how you see something in a store and think to yourself, “Dude! I can totally make that!” Well, this is one that I’ve been itching to try since I got the idea in my head a couple of months ago. The first version didn’t turn out perfectly (I am a novice sewer at best) and so I think I’ll try again in a couple of days.
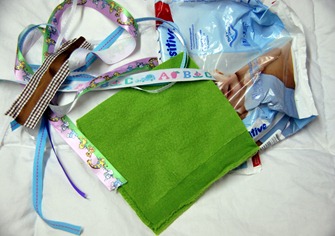
DSC_0100First things first, for this little doozy you’ll need lots of scraps – scrap fabric, scrap ribbon, and an empty wrapper from either your baby’s favorite disposable diapers or your wipes refill pack. I used a wipes refill pack. The plastic from it is actually enough to make two or three, depending on the size.
After you’ve gotten everything together, cut your fabric into two even sized pieces. I picked a square but this can easily be done as a circle, triangle, rectangle… heck, even a rhombus would do nicely. Then measure the plastic and cut it to about the same size.
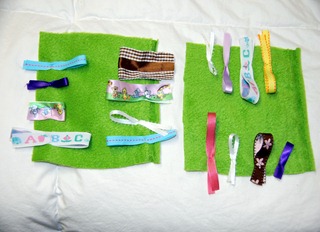
DSC_0104Cut your ribbon into random sizes and pin it to the right side of your fabric so that the loops point inward.  Don’t make the loops too long – about 4 inches of ribbon is plenty long enough when made into a loop. I think I made some of my “tags” too long. When I give it to Bitty Bear tomorrow I’ll see if she tries to put the whole thing in her mouth or not. (I suppose this goes with all toys, but please make sure your children are supervised when playing with this one)
With the right sides facing each other, layer your pieces so that when you turn the rights sides out at the end, the plastic will be in the middle. I put the plastic on the bottom when I went to sew it together. You can just as easily sew the inside seem with the plastic as the top layer. Make sure all the loops point in!!!DSC_0105
Sew around the edge leaving a small gap for turning. Remove the pins and turn the toy right side out (plastic will now be in the middle). Sew a finishing edge around it and you’re done!! Congrats! In about 1/2 an hour you made your babe a new toy!
Happy Sewing!
We're linking up to these linky parties

Tuesday, March 22, 2011

Meal of the Week 2: Ramsay's Ratatouille

Ratatouille?

I’ve been told that without Eggplant its not really Ratatouille. Well, this week’s meal of the week features A Gordon Ramsay version of Ratatouille that lacked eggplant. Why? Well, something happened with the weather and the eggplants didn’t make it to the stores this week. Literally there was exactly ONE eggplant in the whole store and they wanted to charge me 6 bucks for it.
Really? $6 for an eggplant? Mmmm, I think I can do without. So here goes:
Baked Eggs with Ratatouille
Step 1: Make sure the Baby is entertained by the puppy:
 

Step 2: Make Dinner!
For this recipe you will need:
1 Sweet Green Pepper
1 Sweet Red Pepper
1 Red Onion
1 small eggplant
1 zuccini
2 cloves Garlic, chopped
1 can chopped tomatoes (10oz)
4 eggs
1 tsp ground Cumin
1 tsp ground sweet paprika
4-5 Tbsp of Olive Oil
Sea Salt and Ground Pepper
4 oven safe dishes
(This is my approximation of what the actual recipe book says:)
Chop the veggies and place in separate bowls.


Add the olive oil and the onion to a pan and sauté for a couple of minutes. Add the peppers and garlic. Sauté for one to two minutes. Add the zucchini and eggplant continue to allow the vegetables to simmer in the pan for another 1-2 minutes. Add the tomatoes, paprika, and cumin. Cover and simmer for 10 minutes.Divide the Ratatouille between the four dishes and place on a cookie pan. Make an indention with a spoon and crack an egg into each of the four dishes. Sprinkle a little salt and pepper over each egg. Bake at 400 for 10-15 minutes or until the whites of the egg are hard. The yolks will still be a little runny.

My substitutions:
So we didn’t use an eggplant, because we didn’t have one and we didn’t have cumin either… so I used a little taragon and a little ground coriander as a substitute. I’m sure it would taste a little different with the eggplant and cumin and maybe next time I’ll use them. On the other hand, it was pretty good for dinner and we saved the extra two servings for lunch and it was still good reheated for lunch too.
 Next week we'll try a strawberry salsa on salmon fillets MMmmmmm.
Enjoy!

Monday, March 21, 2011

I’m a blogging nube. Give me tips. Please?

I keep finding cool tidbits on other peoples blogs and wonder to myself, How did they do that? That’s a really cool feature, I wonder how I could get that on my blog?
For example, I really want to make a snazzy header. How does one up load a snazzy header once designed? And how does one make a picture into a link? And if I want to make my ads into buttons or get sponsors, how would I do that? These are among the dozens of questions I have. Anyone know where I should look?
Maybe I need a blogging mentor…

Saturday, March 19, 2011

Something old made new...

I love this DIY tutorial for turning an old T-shirt of yours into a new t-shirt for your daughter (or another little girl you know) Those of you with sewing machines are going to love it!

*born-again crafter*: super quick green shirt redo

Thursday, March 17, 2011

A four leaf clover on your shoulder…

or in your hair!
This tutorial shows you how to make your very own four leaf clover that will last.
Materials:
  • 12 inches of 2 in wide green wired ribbon
  • sewing needle and a little thread
  • glue gun
  • button or other embellishment
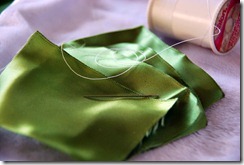
DSC_0010
Step 1: Cut your ribbon into four even pieces that are about 3 inches long and seal the ends using a candle. Be careful not to burn your fingers!
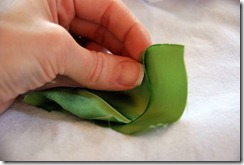
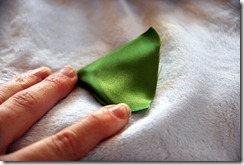
Step 2: (This is the tricky part!) Fold the ribbon so that the top left corner touches the bottom right corner.
DSC_0014
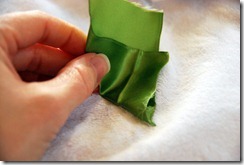
Then fold the ribbon again so that the top right corner touches the bottom left corner.
DSC_0016
You should have something that looks like this:
DSC_0017
Repeat step 2 for each of the pieces of ribbon
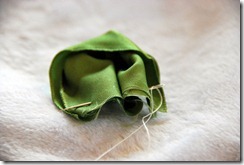
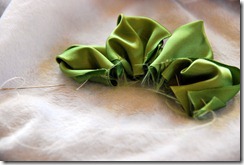
Step 3: Using the needles and thread, string the ribbon petals together:
DSC_0018
DSC_0019
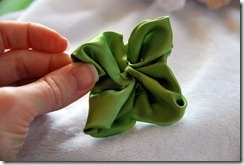
Pull the string tight so that a flower (or clover) is created.
DSC_0021
Tie off the string so that it stays tight and adjust the petals so you like how they look.
Step 4: Embellish with your choice of center pieces
DSC_0022
Use a safety pin to attach it to your blouse for the day or a headband for your daughter.
Happy St. Patty’s Day!

Tuesday, March 15, 2011

Meal of the Week 1: Ramsay's Skewers with Mint Marinade

This week’s adventure in cooking comes from the Gordon Ramsay Healthy Appetite book. While I always make some substitutions, I always include the original recipe with my substitutions in parentheses.
Lamb (Steak) Kabobs!
DSC_0044 (2)
For this recipe you’ll need:
Skewers:
1 lb Lamb leg steaks
8 Cherry Tomatoes
1 Yellow Pepper
1 Red Pepper
8 Crimini Mushrooms
4 bamboo skewers

Herb Paste:
Finely grated rind and juice of one lemon.
2 garlic cloves
1/2 tsp dried oregano
1/2 tsp dried mint
1/2 tsp dried thyme
1/2 tsp dried ground rosemary
1/2 tsp dried tarragon
1 Tbsp olive oil
Sea Salt, Black Pepper
Cut the steaks into 1 inch cubes, stir together the herb paste ingredients and pour over the lamb. Coat evenly and then let marinate for several hours or overnight. Soak your bamboo skewers in cold water for at least 20 minutes.
Prepare the veggies as you like them. Then thread the meat, peppers, mushrooms, and tomatoes on to the bamboo skewers alternately.
Drip your barbecue with a little olive oil and fire it up! Shake some salt and pepper over the skewers and let them grill for about 2-4 minutes. Let them rest for a minute or two and then serve with a side salad. Serves 4.
And now for my substitutions:
Rump Roast was BOGO at Safeway last weak, so we did this recipe with 1/2 a roast. The Roast was quite lean, so I feel like it made for a good substitutions since Ramsay uses lamb as a low fat alternative to beef.

We used Baby Bella Mushrooms instead of crimini because that’s what my husband decided to pick up at the store when I realized last minute that we needed mushrooms and didn’t have any. If it had been any other meal I probably would have just skipped the mushrooms.
And I didn’t have tarragon, so I used a little marjoram. Now, I know they’re completely different, but marjoram goes well on beef so I didn’t think it would hurt. And the meal turned out FANTASTIC so there’s your proof that it didn’t hurt at all. Smile
DSC_0040 (2)A side salad is perfect, and we added a glass of our favorite Pinot Noir. Mmmm!
Next week: My first Ratatouille, also courtesy of Ramsay’s fabulous cookbook.
Happy Eats!